Archive | Foodie Friday RSS feed for this section

Foodie Friday: Wilton Basic Cake Decorating (Class Four)

29 Jul

A quick post to share my final cake from the Wilton Basic Cake Decorating Course. I tried a new icing and cake recipe and ended up not liking either of them, so I won’t share them here. The icing was ok… just not something to gush about. The cake was just plain dry. Ick.

I was pleased with how the cake decoration turned out in the end, especially because it was a rough day in the kitchen… interruptions to dig a roll of toilet paper out of the toilet (thanks to z-baby), busted a container of finished icing on the floor, and lots of help from z-baby (he stuck his play stand mixer and some utensils in the side of my cake while I was icing it)…

So, drumroll please…

My final cake! Cherry blossoms...

Like I said... it was a rough icing experience!

Mom’s cake turned out really pretty — a hydrangea. Unfortunately, the lighting in these pics do it no justice, so just take my word for it!

Mom's final cake!

Hydrangea cake

Foodie Friday: Wilton Basic Cake Decorating (Class Three)

22 Jul

Mom and I had our third class last night and we decorated cupcakes. We were supposed to make two more batches of the icing, but I didn’t do it since I had so much leftover icing from last week (and this stuff lasts for what seems like forever!). So I have the same color scheme going on, but that was fine by me.

We learned a few new flowers tonight. A couple of them were quite ugly no matter how well you made them, which was some comfort, I suppose, because mine looked very little like they were supposed to! And I’m struggling with the leaves — I’ll just admit that up front. After learning these, we were given time to free-style on some cupcakes. Here’s how mine turned out.

Wilton third class cupcakes

Ok, so maybe I need to practice a bit more! 🙂

Mom went above and beyond today and baked extra cupcakes and decorated them before class. Here’s both her class and pre-class cupcakes. They had a lemon filling and were very yummy!

Mom's cupcakes

Mom's cupcakes from class

Mom's cupcakes

Mom's pre-class cupcakes

I filled my cupcakes with an orange cream. It’s actually a dip for fruit that I made yesterday for a fruit platter… today I added some cream cheese to it and blended it smooth to fill the cupcakes. My mom originally made this for my baby shower and it was a huge hit. But I really didn’t get to eat it because my morning all-day sickness was still in full-force. This was the first time I made it and it was worth the wait.

Orange Sour Cream Fruit Dip

  • 6 ounces frozen orange juice concentrate, thawed
  • 1 1/4 cup milk
  • 1 (3 ounce) package instant vanilla pudding
  • 1/4 cup sour cream

Combine orange juice, milk, and pudding in a mixing bowl and blend until smooth. Stir in the sour cream and chill for at least 2 hours. Note: the dip gets sweeter the longer it sets. Enjoy!

Foodie Friday: Wilton Basic Cake Decorating (Class Two)

15 Jul

My mom and I have wanted to take a class together for some time now, and we  both love being in the kitchen. So when we saw a cake decorating class was about to begin, we jumped at the chance.

I love to bake. But I could certainly use some help in the decorating department. Remember z-baby’s Choo Choo Birthday Cake? I loved this cake, but um… yeah.

So we enrolled and started our Wilton Basic Cake Decorating class last week. In the first class we decorated sugar cookies. But we were so rushed we only got through two of them and then sig-o attacked them when I got home so I never got a chance to take pictures.

This week, however, we decorated our first cake. We had to bake the cake and make the icing ahead of time. I was having one of those days in the kitchen, which was a rough start. I had already decided to just use a box cake to keep things simple, but I used a different pan than I normally do and it turned out awful. Lopsided and flat. Ugh. Quick trip to the store and rebaked another cake that turned out great. Geez! Then I added 8 tablespoons of water instead of teaspoons to the icing. Oops. Luckily I was able to just pour it off the vegetable shortening and start over. Which leads me to the Wilton Buttercream Icing recipe (I used water instead of milk, as suggested by our instructor). I know its a decorating icing, but yuck! I’m making it for the class and then I’ll be experimenting with other icings that will work as well but that actually taste good.

But back to the decorating.

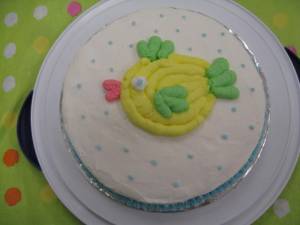
Z-baby saw a cupcake cake in my course guide and went crazy over it. So I made the cupcake cake and my mom made the fish cake. I was most excited about learning how to make the icing on the cake as crazy smooth as it looks in the Wilton book. Yeah right. And then I thought the class ended at 8pm instead of 8:30pm, so I decorated my cake in 10 minutes flat. I was piping like a crazy woman. So I then spent the last half hour adding dots to it… which is why there are soooo many.

This is what the cake was supposed to look like.

Wilton Cupcake Cake

See what I mean? Crazy smooth!

And this is what my cake actually looked like.

My Cupcake Cake

The 10-minute Cupcake Cake

This is my mom’s cake. I thought it turned out really cute. Notice her restraint with the dots. 🙂

Mom's Fish Cake

Mom's Fish Cake

It’s a start and I learned some things and we had a lot of fun. Next time we decorate cupcakes, which I already baked yesterday and stuck in the freezer for next week. And then I have to design something fun for my final cake. Hmmmm…

Foodie Friday: Superman Bread

29 Apr

Toddlers, by nature, are picky eaters, but I think I have the world’s pickiest one. It’s baffling to me, really, how my husband and I — arguably some of the world’s least picky eaters — wound up with this choosy this guy… but I suppose it’s yet another of life’s lessons in patience for us.

At just over 2 years old, z-baby will eat: some breakfast cereals with milk, yogurt, pasta with parmesan, tortillas (corn and flour), rice, bread, animal crackers, corn on the cob, dried cranberries, and smoothies. On rare (sometimes very rare) occasions he will eat apples, sopa aguada (a Mexican pasta soup), and peanut butter. And he never refuses a sweet treat offered to him by his grandmas… it’s as if he can smell the sugar and accepts the treat before he’s even seen it. Nutritionally speaking, my only comfort is that he still nurses.

So in an attempt to sneak some more veggies into his diet (in addition to smoothies), I’ve been trying out some breads. I found a recipe that looked great on paper but bombed big time. So I’ve turned to my grandmother’s basic zucchini bread recipe and adapted it a bit. There’s a lot of extras and variations I plan on trying, but for today I wanted to stick to the basic recipe and just change a couple of things to see how it works. I call this Superman Bread, because you can really pack in the veggies and good stuff… which hopefully balances out the bit of sugar in it!

******

Superman Bread

  • 3 eggs
  • 2 tsp. vanilla
  • 2 cups sugar
  • 1 cup vegetable oil
  • 2 cups grated zucchini (instead of zucchini I used 2 shredded carrots and 2+ cups very finely chopped raw kale)
  • 3 cups flour
  • 2 tsp. cinnamon
  • 2 tbsp. flax meal (also my addition)

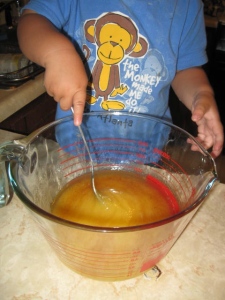
Beat eggs. Add sugar, vanilla, oil, and vegetables and mix well.

Stirring eggs and sugar

Wet ingredients before adding the veggies

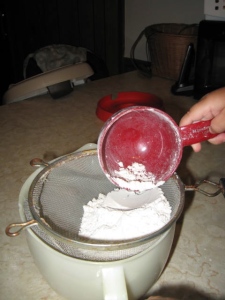
In a separate bowl, sift together the dry ingredients.

Measuring flour

Measuring and sifting flour

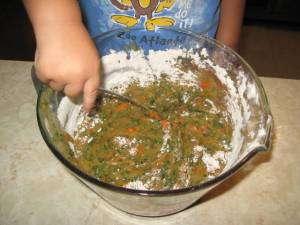
Add dry ingredients to the wet ingredients and stir together.

Stirring in the flour

Stirring is hard work!

Pour into greased loaf pans and bake at 350°F for approximately 45 minutes, or until a toothpick comes out clean.

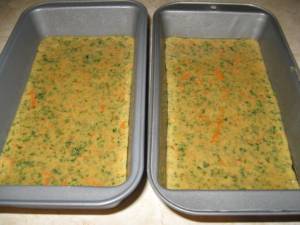
Before baking

Superman bread, before baking

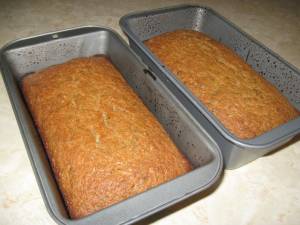
After baking

Superman bread, after baking

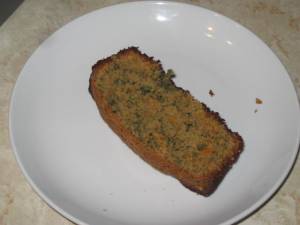
Slice of superman bread

You can see, but not taste, the veggies!

Additional changes I’ll be trying in the future to up both the nutrition and appeal:

  • maybe pureeing the veggies instead of shredding
  • whole wheat flour
  • wheat germ
  • mashed bananas
  • raisins and cranberries
  • Spinach, zucchini, sweet potatoes
  • substitute sugar for agave nectar
  • chocolate chips for a special treat!

Foodie Friday: Chicharron en Salsa Verde

22 Apr

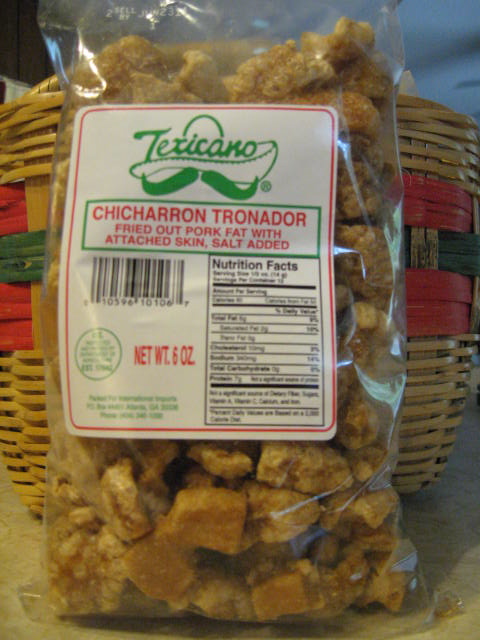
Chicharron

Chicharron en salsa verde is a common Mexican guisado, and one that is simple to make. Sig-o requested it for the menu this week so I thought I would share it with you. Unfortunately, it’s not always easy finding fresh chicharron where we live, so I use the packaged stuff in a pinch. This particular kind turned out particularly well — it holds it’s body well in the sauce.

When we lived in my husband’s hometown in Mexico, I spent most of my free time in the kitchens of any of the Doñas who would take me in. I learned a lot from them, including the fact that there is no one way to make even the most typical of Mexican dishes — everyone has their own special touch or secret. I was recently talking recipes with my suegra and she told me how she makes picadillo. When I told her that her closest comadre makes it fundamentally different, she was in shock (maybe because she didn’t know… or maybe because I did!). And so it is with salsas. Salsas vary by dish, of course, by region, and by individual. So here is one that I picked up along the way, served with chicharron.

******

Chicharron en Salsa Verde

Tomatillos (~25)

Jalapeños (~3, or to taste)

Dried chile (1-optional; I used a chipotle this time)

Onion (1/2 large)

Garlic (2 cloves)

Peppercorns (~6)

Clove (~1)

Chicken broth or bouillon (Knorr Suiza)

Oil
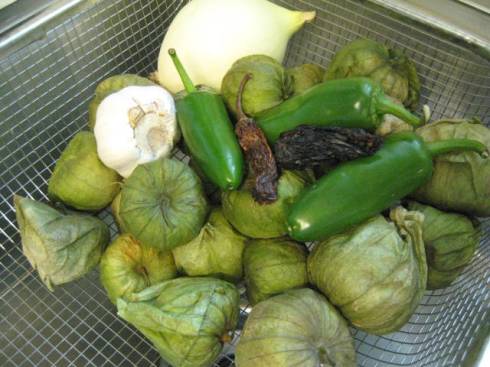
Tomatillos and chiles

As I’ve mentioned before, I’m not the best at measurements. You can play around with this until you get the taste that best suites you — we like things pretty spicy around here.

Remove all the husks from the tomatillos. In case you’ve never seen one naked, here’s what they look like once you removed the papery husk.
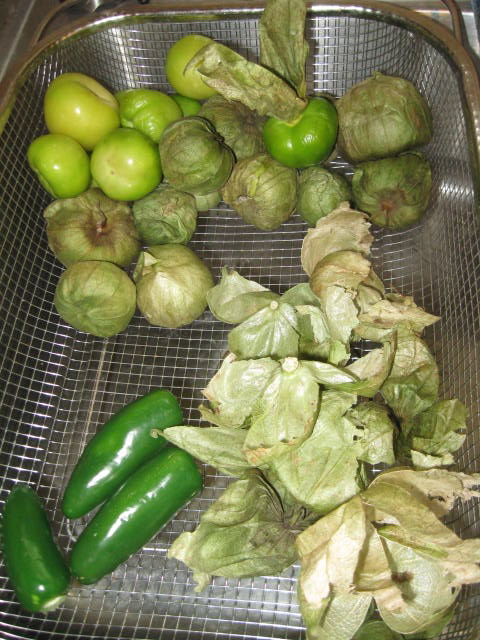
Tomatillo husks

Rinse well and then place in pot with chiles and just enough water to cover. Bring to a boil and remove from heat once they begin to soften. You’ll notice in the picture below that I threw a dried chile in the mix, as well. Not a must, but I think it gives it a little extra kick and another layer to the texture of the taste. But note that it will also turn your “green” salsa a little more to the orange side.
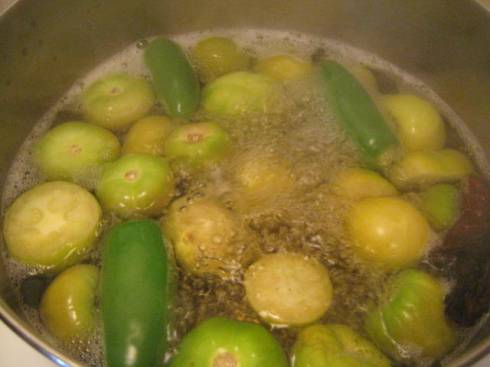
Boil tomatillos

Toast the garlic, cloves, and peppercorns. I usually also toast some whole cumin seeds, but I realized I’m out today, so I just left it out. Once toasted I also usually grind the spices (not the garlic) in my molcajete (mortar and pestle), but z-baby woke up from his nap just as I was at this step so I threw it all in the blender instead.
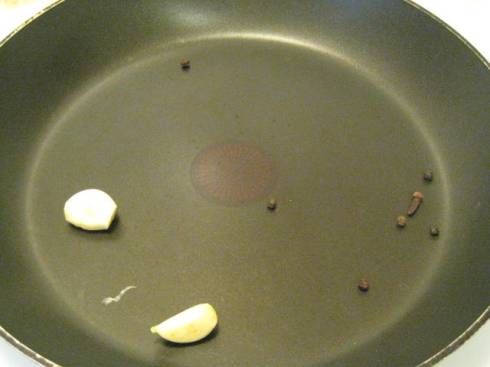
Tostando ajo

Puree the tomatillos, chiles, garlic, and spices using the same water everything was boiled in. Don’t throw out that extra water yet — it’s the golden rule! Heat oil in pot and add onion. Allow it to brown and soften slightly, then add it to the blender and puree it in with the salsa.
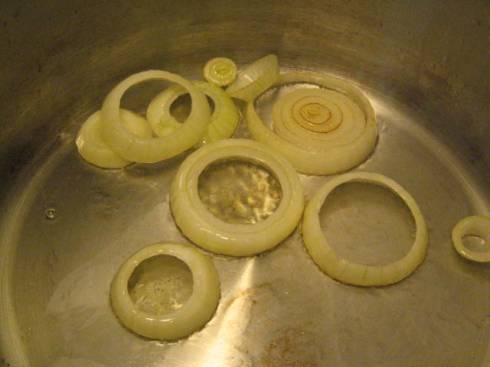
Cebolla

In the same oil the onion was cooked in, add the pureed salsa. Add some of the additional water the tomatillos were boiled in if the sauce seems too thick. Bring to a boil. Add the Knorr Suiza. How much? I say start with just a pinch and work your way up. Remember, the chicharron will also add salt. I err on the side of “less is more.” My suegra, on the other hand, about gives me a heart attack every time I see her add in her querida Knorr Suiza… but then again, she’s the one who has had multiple successful restaurants in Mexico (no pressure, nuera!). So try a little, then add some more!
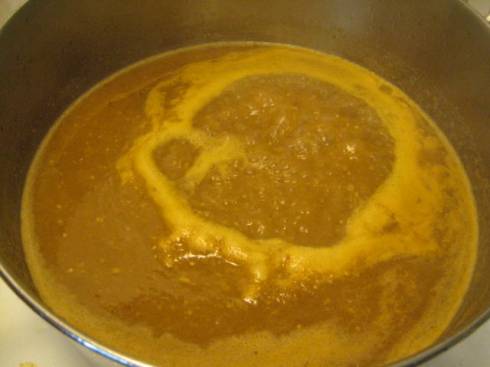
Salsa

Once the salsa is up to a boil, add the chicharron. Cook on low until the chicharron has softened. This usually doesn’t take longer than around 15 minutes (it’s still not quite to that point in the photo below).
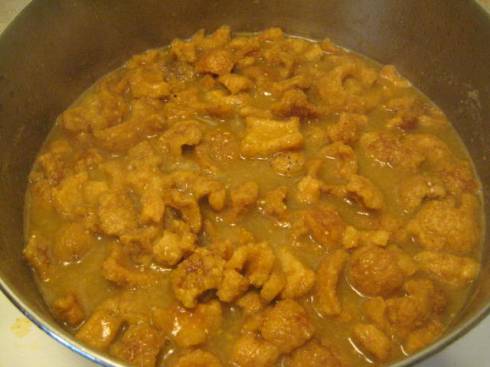
Chicharron en salsa verde
Serve with fresh corn tortillas, or spoon it into hot gorditas… the possibilities go on and on. ¡Provecho!

Foodie Friday: Baked Stuffed Chicken

15 Apr

It’s been a busy week, with grandparents visiting, ER and vet ER visits, and an unexpected in-laws visit mixed in. But I did manage to snap a few photos as I fixed dinner for everyone one night. The photos aren’t great, but heh, I never promised they would be!
******

Ever since we’ve been together, sig-o has told me how much he loves chicken cordon bleu. Mind you, he never orders it anywhere and I’ve never seen him eat it. But he brings it up every so often and I’ll make a mental note to try and make it… and then I promptly forget. Finally a few months ago I came up with this variation on a theme of chicken cordon bleu. It’s so simple and sig-o was happy with the result. In the end, does anything else really matter? Nah… The variations for this recipe are endless, by the way. I’ve also made it stuffed with spinach and feta and that turned out fabulous!

Note – I’m not big on measurements when I cook (unless I’m baking), so my recipes can be vague sometimes. I’ll do my best here, but feel free to shoot me a question anytime!

******

Baked Stuffed Chicken

  • 6 Boneless, skinless chicken breasts (or more or less)
  • 2 eggs
  • Fine bread crumbs
  • Salt, pepper, paprika, garlic powder
  • Ham slices
  • Swiss cheese

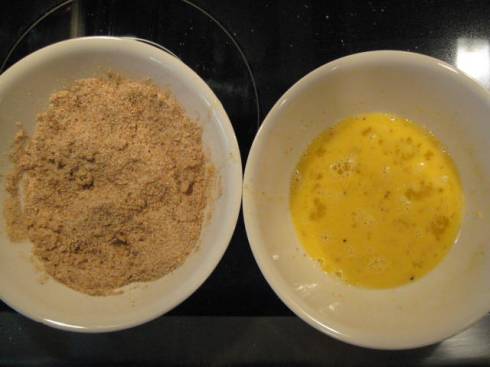
Place bread crumbs in a shallow dish or bowl. Season with salt, pepper, about a tsp of paprika and garlic powder to taste. Beat eggs in another bowl and place side-by-side.

egg and breadcrumbs

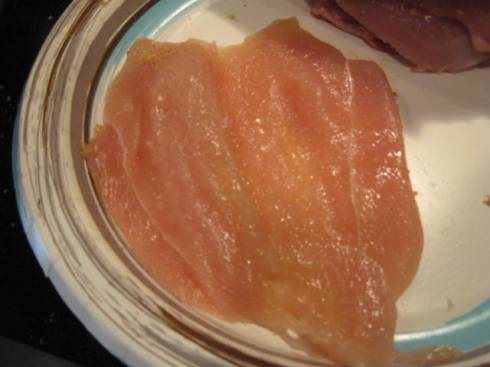
Slice chicken breasts down the middle until filleted open, leaving a hinge along one side.

filleted chicken

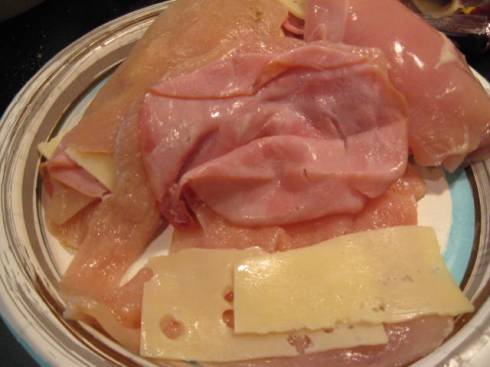
Place one slice of cheese and one slice of ham on chicken and fold closed.

ham and cheese

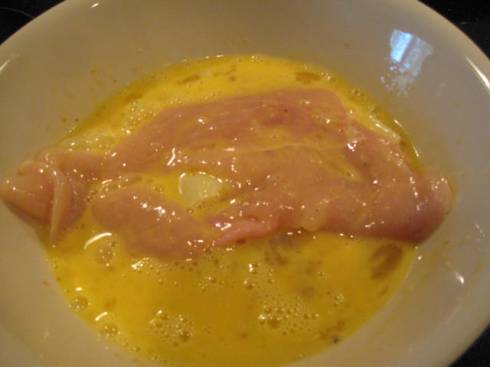
Dip filled chicken in the beaten egg until well-coated.

chicken in egg

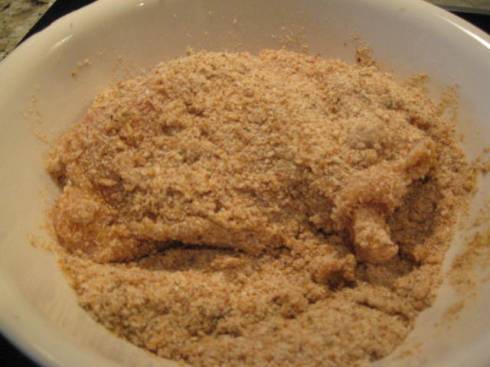
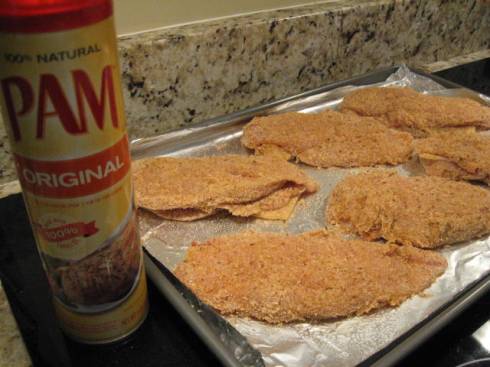
Roll coated chicken in breadcrumbs until well-coated. Shake off excess breadcrumbs and place on baking pan (I cover mine in aluminum foil). Repeat for all chicken breasts. Lightly spray tops of chicken breasts with cooking spray (the cooking spray makes it a little crispier on top).

chicken in breadcrumbs

spray with pam

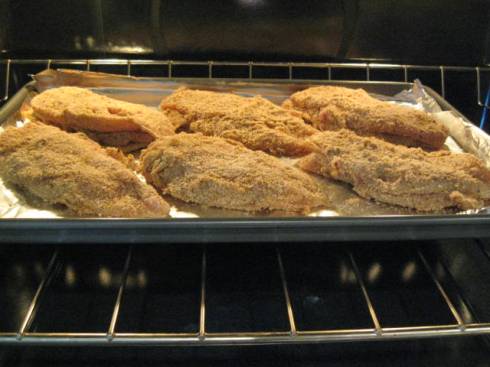
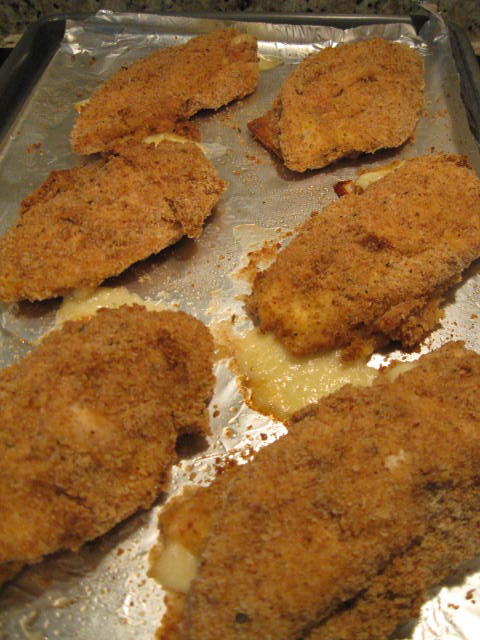
Bake at 350 degrees for about 30 minutes or until chicken is done.

in the ovenEnjoy!

chicken's all done

Foodie Friday: Fruit Pizza

8 Apr

It’s been one of those weeks… an ER visit with z-baby, an emergency vet visit with the dog last night for a possible poisoning (by a neighbor, no less!), grandparents visiting, a surprise in-law visit, family bickering that goes along with an extended visit (ugh!), and two birthdays. So with all that going on, I thought this would be a nice, simple recipe to share. It doesn’t get easier than this. Oh, I did find time to go pick another bucket of strawberries, though! When does this cross over to an obsession? 🙂

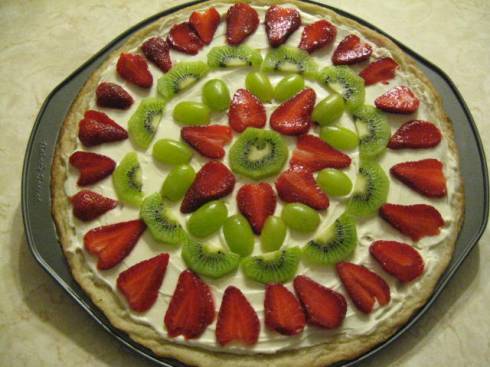
Fruit pizza is a fun and oh-so-easy recipe you can wow the kids with. It’s also great for potlucks and parties. I think it would be beautiful to make little cookie-size pizzas, too.

Fruit Pizza

Fruit Pizza

Fruit Pizza

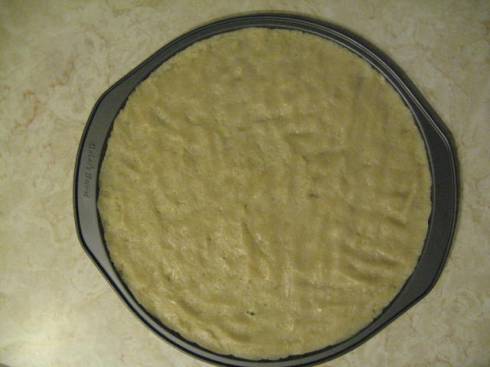
Crust: Sugar cookie dough (either homemade or 1 pkg prepared). It’s so easy to make the homemade dough, but I used a prepared package this time. It’s easiest to use a round pan with a lip — you just mash the dough into the pan until it’s fully spread out. Otherwise, chill dough and roll out into one large, round cookie. Bake at 350 degrees. I like a softer cookie, so I catch it just as the edges are starting to turn golden.

Cookie dough

Cookie dough before baking

Sauce (icing): Mix together 8 ounces cream cheese, 1/2 cup sour cream, 1/4 cup sugar, and 1 teaspoon vanilla. Blend until creamy and smooth. I find I have to use a hand mixer to get it this creamy. Once cookie is cool, Spread icing evenly over cookie, leaving about a 1/2 to 1/4 inch for the crust.

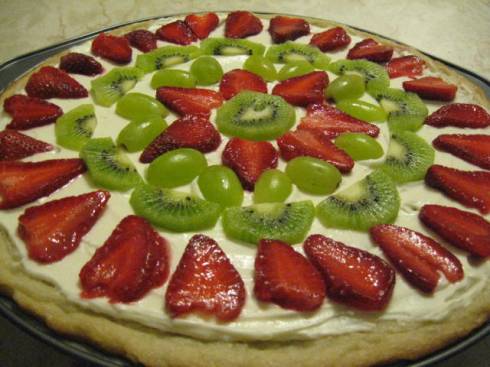
Fruit: Decorate top of pizza with sliced fruit. You can scatter it across haphazardly or arrange it piece by piece. I always arrange, and no two ever turn out the same. The possibilities are endless, of course, but here is a list of fruit that works well. I just used what I had on hand this time. You can even drizzle melted chocolate over the top of the fruit. You can put a lot more fruit on if you wish… I was multi-tasking while I made this (catching up with an old friend on the phone and managing a fussy toddler) so I just threw it together as I went.

  • Strawberries, blueberries, raspberries, blackberries
  • Kiwi
  • Grapes
  • Mandarin oranges
  • Pineapple
  • Banana
  • Peaches
  • Pomegranate
Fruit Pizza

A masterpiece (with so little effort!)

Foodie Friday: Strawberry Pie

1 Apr

When I brought home my first 10 pounds of strawberries last week, sig-o requested a strawberry pie. I took my time looking through recipes, and finally pieced together this one. It was worth the wait. How I never knew that strawberries pies need no baking, I don’t know. But they don’t! This was so easy to make, and the perfect dessert when it’s too hot to turn the oven on (or if you don’t have an oven, like me the whole time I lived in Mexico). So go, run and get some strawberries and try this today!

Strawberry Pie

Crust

  • 1 1/4 cups graham cracker crumbs
  • 2 tbsp. sugar
  • 6 tbsp. unsalted butter, room temperature

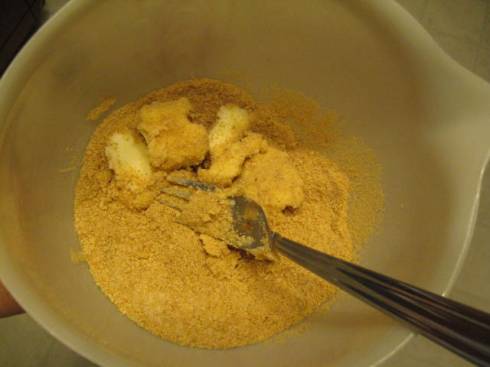
Mix all ingredients together. Even at room temperature, you’ll have to really work the butter in.

Mixing crust

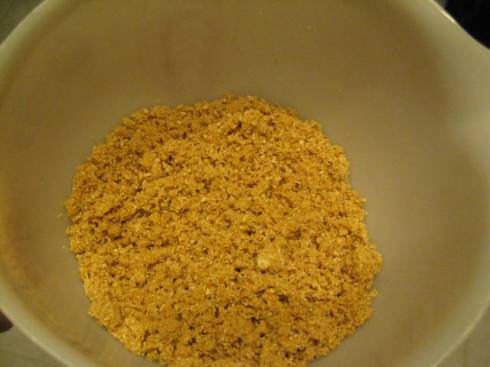
When you get something that looks like sand, you’re done.

Sandy crust mixture

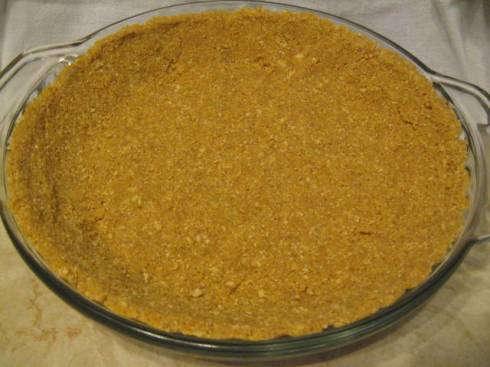
Dump into a pie dish and press with your hands onto bottom and along sides until crust covers dish. Chill crust until you’re ready to fill it.

Graham cracker crust

Filling

  • 1 1/2 quarts strawberries
  • 1/2 water
  • 1 cup sugar
  • 3 tbsp. cornstarch

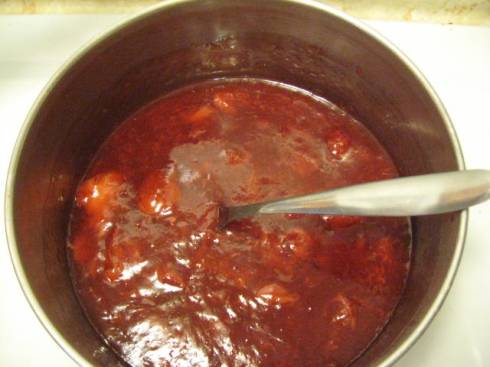
Mix together sugar and cornstarch in medium pot. Add water and 1 cup of crushed strawberries. Mix well and bring to a boil. Let boil 2 minutes, stirring constantly. Remove from heat and let cool.

Pie filling

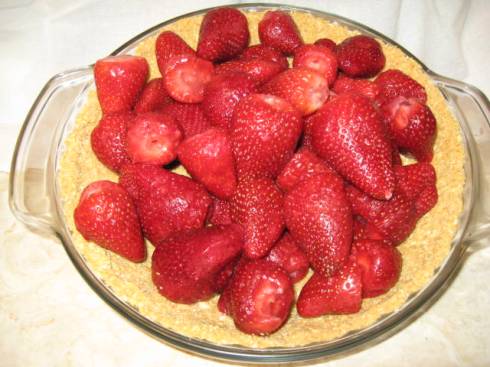
To assemble pie, place the rest of the berries in the pie crust. You can slice them or toss them in whole.

Berries in crust

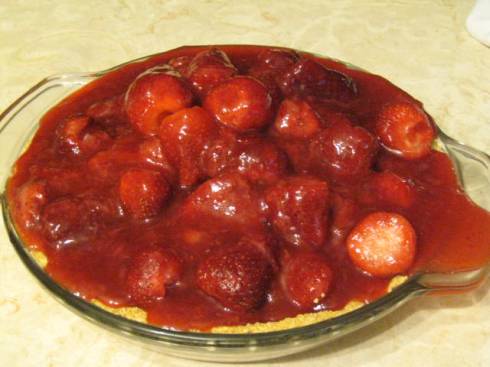
Pour the cooled pie filling over the berries. Mine overflowed like a lava field. Looks like a total mess. But I made some fresh whipped cream and after chilling the pie several hours and topping with the whip cream… who cares what it looked like — it was great!

Strawberry pie

Foodie Friday: Strawberry Jam and Fresas con Crema

26 Mar

Foodie Friday… coming to you on Saturday because my mom had an unexpected gallbladder surgery yesterday (she’s feeling better already!).

With all of the strawberry craze this week, did you think I’d make anything without them? No way!

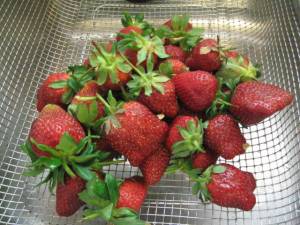
Strawberries!

Continue reading

Foodie Friday: Creamy Spinach Pasta

17 Mar

In the spirit of St. Patrick’s Day this week (a pretty big deal in these parts…), I give you some green goodness.

One day when we lived in Mexico, I had a bunch of fresh poblano chiles and a craving for pasta. So I created Creamy Poblano Pasta, which has become a permanent member of the family recipe box. The other day I was stuck at home with no car and was low on groceries. I contemplated walking to the store, but decided I could pull together a dinner with the few things I had on hand: pasta, cream, and spinach. Z-baby is an avid pasta eater (read: food jag) so I thought that as an added bonus, I might get some veggies into him. But alas, no such luck.

Creamy Spinach Pasta

  • Spinach, about 4 big handfuls
  • 1/2 sm onion, chopped
  • Garlic to taste
  • ~1 cup cream (I’ve used Mexican cream, heavy cream, sour cream)
  • Pasta (I used spaghetti)
  • 1/2 cup Parmesan cheese, or more to taste

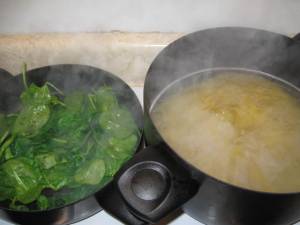
While pasta is cooking, steam or saute spinach with chopped onion and garlic.

Saute Spinach

It's a tight squeeze on my tiny stove

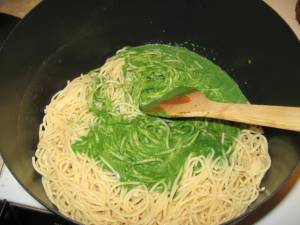
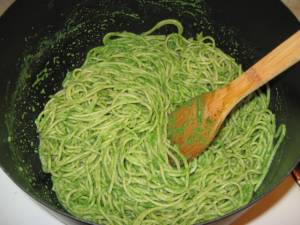
In a blender or with a hand mixer, puree spinach with the cream. Add small amount of olive oil to pan. When heated, add spinach puree and cook for several minutes, stirring frequently. Add more cream as needed. Add sauce to drained pasta and mix until well-coated. If sauce is still too thick, add small amount of water that pasta was cooked in to thin little by little (this may be especially necessary if you use sour cream). Stir in parmesan cheese until well-incorporated.

Add spinach sauce

Add pureed spinach to pasta

Stir in spinach puree

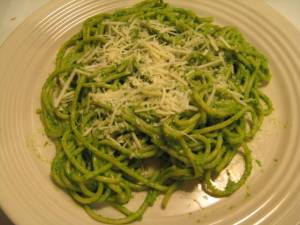
Top with additional parmesan or romano cheese for serving.

Creamy Spinach Pasta

Bad pic, but yummy pasta!

I think I liked the poblano pasta better, but this will certainly do in a pinch.